Achieving Seamless Automation: Data-driven testing with our custom automation solution.
Test automation is critical in ensuring application reliability and performance in modern software development. However, static test cases can be limiting, requiring constant updates for different scenarios. This is where Data-Driven Testing (DDT) comes into play, allowing testers to execute test scripts with multiple sets of data, improving efficiency and coverage.
Our Automation Tool - Data-Driven Testing
This blog explores our tool, which reads test cases from input values stored in external sources like CSV files, and demonstrates the end-to-end automation process we developed to streamline automation testing.
Data-Driven Testing (DDT) is a test automation approach where test cases are executed using different input values stored in external sources like CSV files, Excel sheets, databases, or XML/JSON files. This approach reduces redundancy and enables the execution of numerous test scenarios without modifying the test script.
Step-by-Step working of Our Custom Testing Automation Tool
1. Documenting the Test Flow in Excel
The first step in our automation journey involves preparing a clear plan for the testing process. This is done by creating an Excel sheet outlining the testing process flow. The sheet includes essential details such as:
Schema Name: Identifies the structure and components involved in the test.
Buttons & Fields: Specifies the elements with which the automation code will interact.
URLs & Links: Lists the necessary URLs and links for navigating the application.
Steps & Button Clicks: Details the step-by-step actions the automation program will execute, including which buttons need to be clicked.
The Excel document serves as the foundational step, providing detailed, step-by-step information for each testing scenario in the automation process. It helps keep everything organized and ensures clarity throughout the workflow. For each testing scenario, an Excel sheet like this is created, which can be reused multiple times to test the same procedure or process efficiently.

2. Running the Custom Automation Program
Once the test flow is defined in Excel in detail step by step and ready to use, we execute the automation script. This is done through the Selenium Editor, where we run our custom automation program.
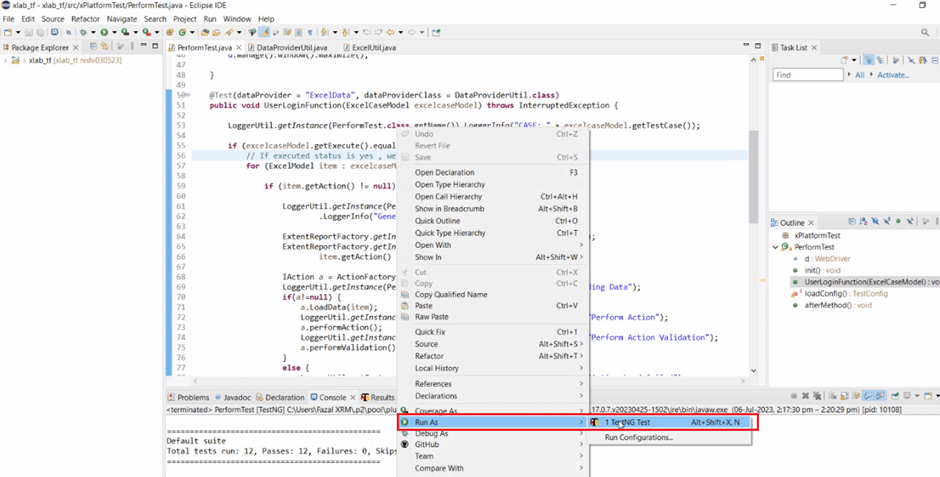
Selenium, a widely used tool for developers automating web applications, is the backbone of our automation testing tool. The program code is set up to follow the testing steps defined earlier in the Excel sheet.
3. Launching the Automated Browser
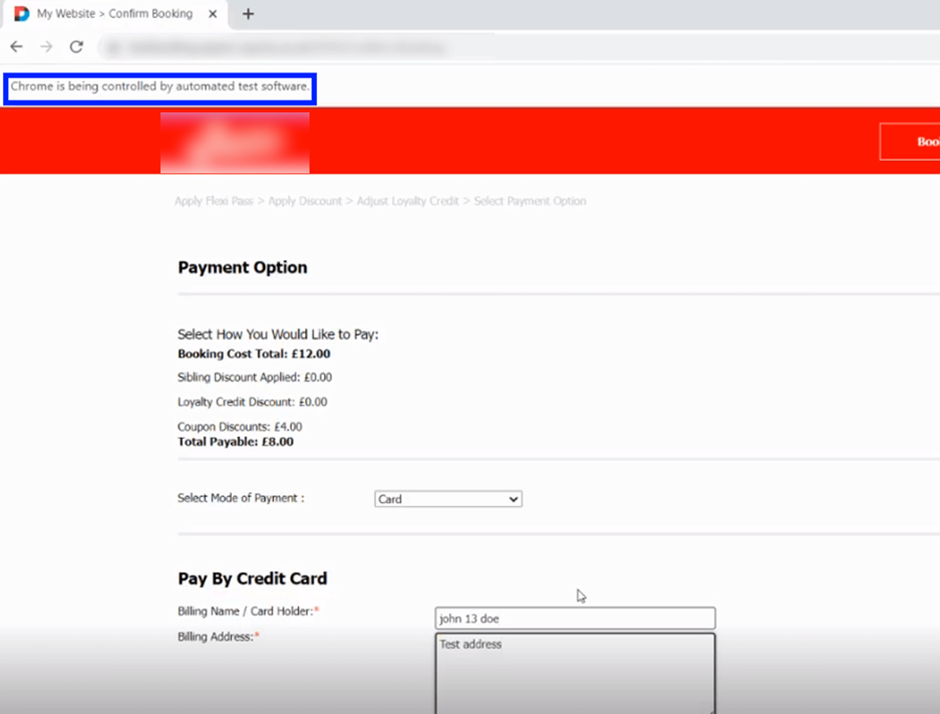
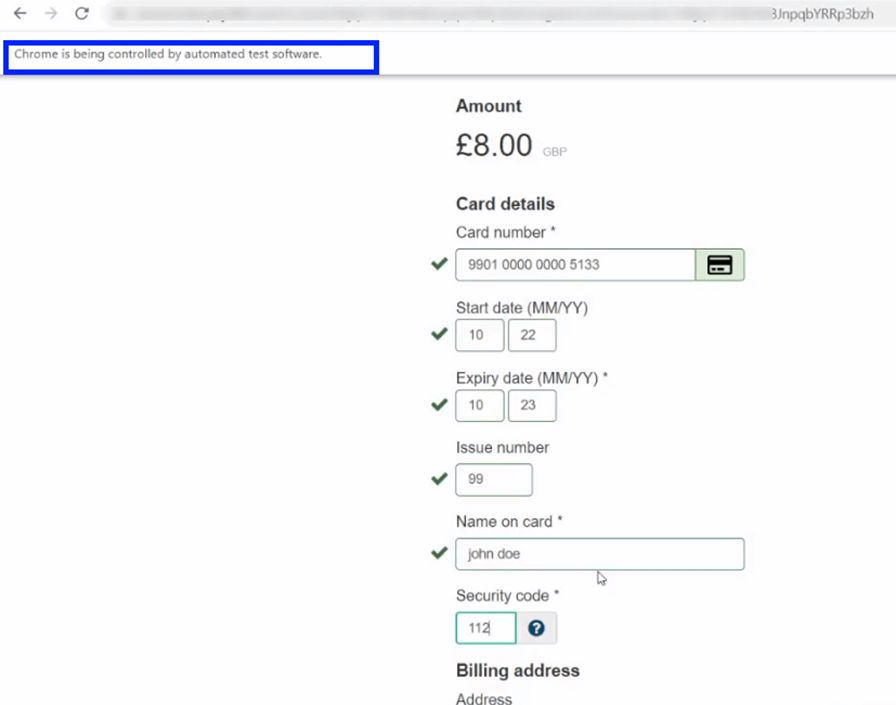
When the automation script is executed, it automatically launches the Chrome web browser configured for the test environment and makes a demo test payment with test card details. This eliminates the need for manual interaction and ensures that the test is executed consistently each time.
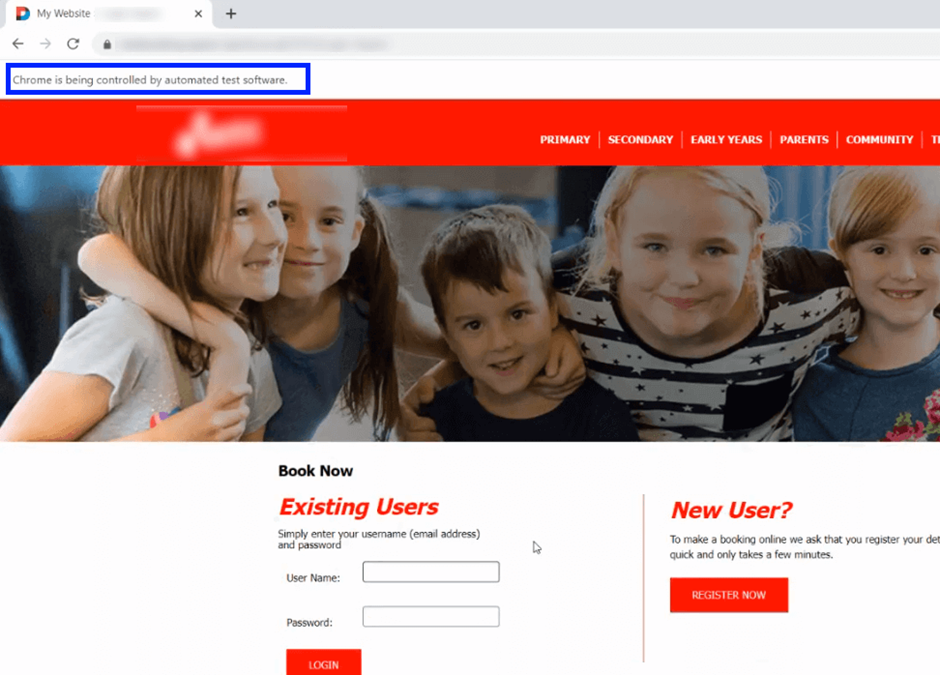
Selenium handles all the clicks, navigation, and data entry as defined in the testing steps, reducing human error and speeding up the testing process.
4. End-to-End Test Execution
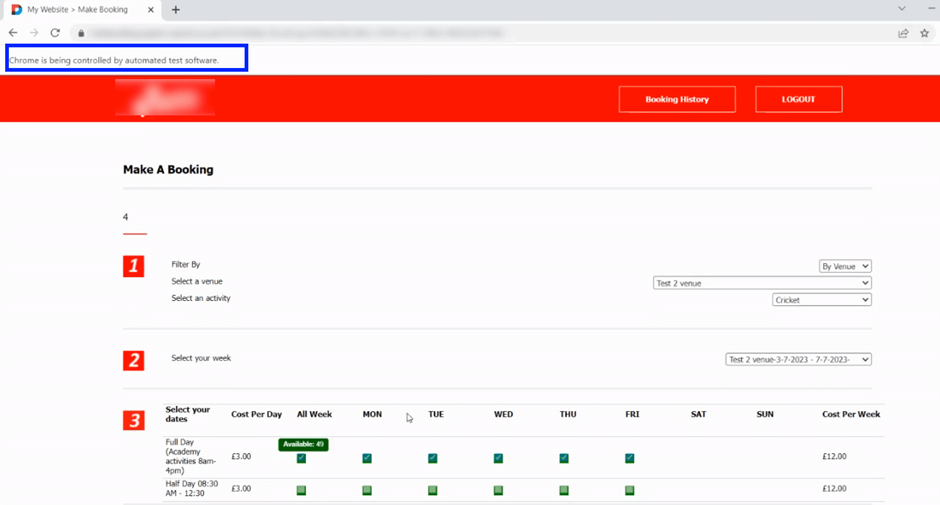
The test begins with the login process on the booking application. From there, the program proceeds to perform a series of actions, like making login to the booking website, including filling out forms, selecting options, and interacting with the applications as per the inputs mentioned in the supplied Excel to the automation code.
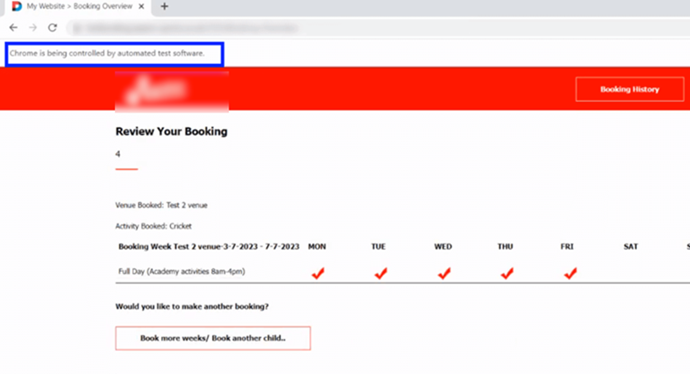
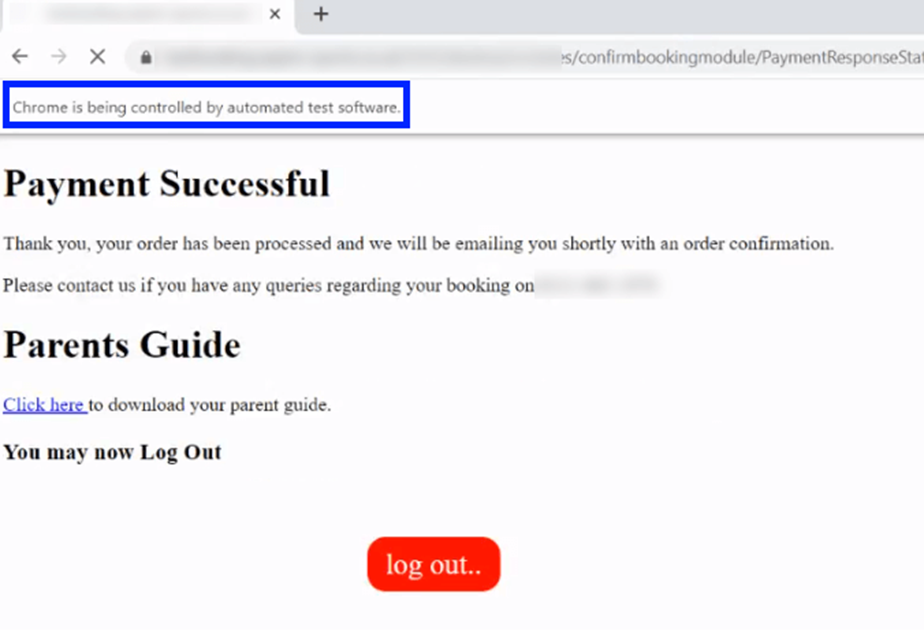
The automation program ends with a successful payment for a child booking made, as shown in the above process, verifying that the entire process works as expected.
Conclusion
Our Automating the testing tool can significantly reduce the time and effort required for manual testing. With our testing tool, we can simulate real-world scenarios, ensure accuracy, and improve the overall reliability of the application. By mapping out the testing flow in Excel, we ensure that each step is documented and easily executable, offering both clarity and efficiency.